Baking is an art that has delighted taste buds for centuries. The aroma of freshly baked goods wafting through the air can instantly uplift anyone’s mood. While traditional methods often involve using specialized equipment like baking pans, there are times when you might find yourself without the right tools. Don’t worry! We’re here to guide you through the process of making mini cakes without a pan, in a detailed and comprehensive manner. Get ready to embark on a creative baking journey that will leave you with delectable treats for any occasion.
Why Bake Mini Cakes Without a Pan?
The idea of baking mini cakes without a pan might sound unconventional, but it comes with several benefits:
- Versatility: You’re not limited by the constraints of traditional pans, allowing you to craft various shapes and sizes for different occasions;
- Resourcefulness: No need for specialized equipment or expensive pans, making it accessible and budget-friendly;
- Portion Control: Mini cakes let you have control over the size and servings, fitting various dietary needs and preferences;
- Unique Presentation: Stand out from the crowd with unconventional and innovative displays that are sure to impress.
Methods for Baking Mini Cakes Without a Pan
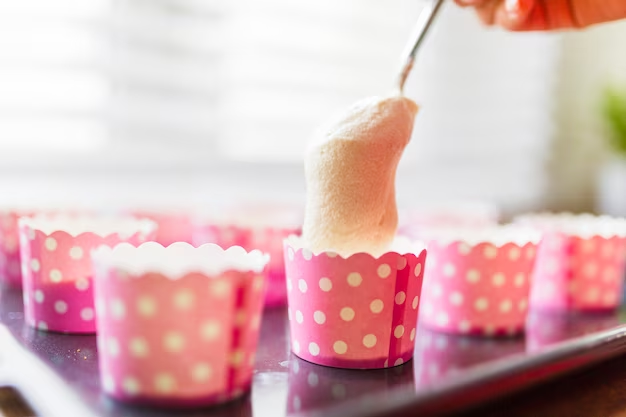
1. Using Aluminum Foil or Parchment Paper
| Step | Description |
|---|---|
| 1 | Cut the foil or parchment paper into squares large enough to mold around the cake batter. |
| 2 | Shape the foil or parchment into the desired shape. |
| 3 | Fill with cake batter, being careful not to overfill. |
| 4 | Place on a baking sheet and bake as usual. |
2. Using Silicone Molds
| Step | Description |
|---|---|
| 1 | Choose silicone molds in desired shapes and sizes. |
| 2 | Fill with cake batter, following the same guidelines as regular baking. |
| 3 | Bake according to your recipe’s instructions, but monitor closely as baking times may vary. |
3. Using Oven-Safe Glasses or Cups
| Step | Description |
|---|---|
| 1 | Select oven-safe cups or glasses in the desired size. |
| 2 | Grease the inside to prevent sticking. |
| 3 | Pour batter and bake, adjusting the baking time if needed. |
Tips and Tricks
- Batter Consistency: A thicker batter will hold its shape better without a solid mold;
- Baking Time: Mini cakes may require less baking time than standard cakes; keep a close eye on them;
- Decorating: Enhance the presentation with creative frosting, edible glitter, or fresh fruit.
Ingredients You’ll Need
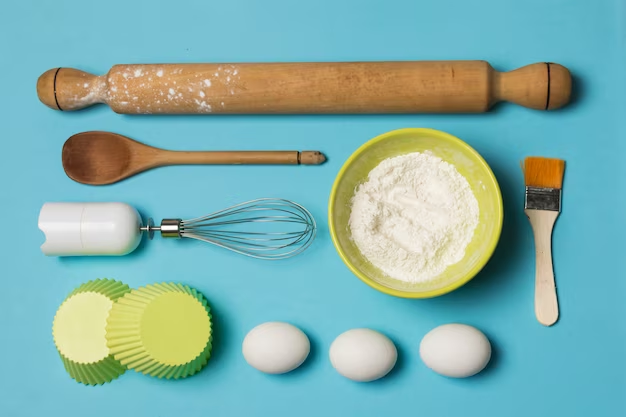
Before we embark on this creative endeavor, it’s essential to assemble the following ingredients:
- Cake Batter of Your Choice: Whether you opt for a velvety chocolate, a luscious vanilla, or a zesty lemon flavor, the foundation of your masterpiece lies in the cake batter. You can either choose a trusted store-bought mix or channel your inner pastry chef and whip up a homemade batch;
- Parchment Paper or Silicone Baking Mat: The canvas for your cake artistry, parchment paper or a silicone baking mat, ensures easy release and minimal sticking. It paves the way for flawless cake shapes to emerge;
- Baking Sheet: A trusty baking sheet will provide a sturdy surface for shaping your cakes. It’s the backdrop upon which your creativity will unfold;
- Cookie Cutters or Templates: These are the magic wands that grant your cakes their extraordinary forms. Whether you’re aiming for geometric precision or whimsical designs, the right cookie cutters or templates are your allies in this artistic journey.
With these ingredients at the ready, you’re now poised to transform the mundane into the extraordinary, the everyday into the extraordinary.
Step-by-Step Guide
Follow these steps to create mini cakes without a pan:
| Step | Description |
|---|---|
| Step 1: Prepare the Cake Batter | Before embarking on your mini cake adventure, start by selecting your favorite cake recipe. Whether it’s a rich chocolate cake, a moist vanilla sponge, or a tangy lemon delight, make sure to follow the recipe instructions meticulously. The key is to ensure your cake batter is smooth, lump-free, and irresistibly flavorful. |
| Step 2: Line the Baking Sheet | Setting the foundation for your mini cake masterpiece begins with a baking sheet. Imagine a canvas ready to receive your culinary artistry. Lay a piece of parchment paper or a silicone baking mat onto the baking sheet. This ingenious move will not only prevent the cake batter from sticking but also make it a breeze to lift your mini cakes later. |
| Step 3: Spread the Batter | With your baking sheet prepped, it’s time to gently pour or spoon the cake batter onto the parchment paper or silicone mat. This is where your culinary intuition comes into play. An offset spatula or the back of a spoon becomes your creative brush as you artistically spread the batter evenly. Remember, the thickness of the batter holds the secret to the texture of your mini cakes – whether they’re delightfully fluffy or elegantly dense. |
| Step 4: Shape the Cakes | Now, the magic begins. Cookie cutters or templates are your tools of transformation. As if sculpting a masterpiece, press these shapes into the batter. The cake yields to your design, revealing mini cake shapes that are uniquely yours. If cookie cutters are elusive, fear not! A knife can be wielded to conjure freeform shapes, fostering an artistic, rustic charm. |
| Step 5: Bake the Mini Cakes | Picture your kitchen turning into a cozy bakery as you preheat the oven to the temperature dictated by your chosen cake recipe. Gently place the baking sheet adorned with your shaped cakes into the oven, and the enchanting aroma of baking confections begins to fill the air. While they bake, keep a watchful eye, as the recommended baking time may vary based on the thickness of your creations. |
| Step 6: Test for Doneness | As the timer ticks away, anticipation builds. To ascertain perfection, gently insert a toothpick into the center of one mini cake. Does it emerge clean or with a few moist crumbs clinging to its surface? If yes, your mini cakes are done. If not, exercise patience and allow them a few more minutes in the oven before retesting. |
| Step 7: Cool the Mini Cakes | As your mini cakes emerge triumphantly from the oven, they deserve a moment of admiration. Carefully lift the parchment paper or silicone mat, transferring the cakes to a cooling rack. This intermission is essential, allowing your creations to cool completely before the grand finale of decoration. |
| Step 8: Decorate Your Mini Cakes | Now is the time for the pièce de résistance – decoration! Unleash your inner artist as you embark on a journey of garnishing. Picture this: a table adorned with bowls of vibrant frostings, whipped creams that rival clouds, plump and succulent fruits, and an assortment of sprinkles like confetti. Your mini cakes are your canvas, and your palette is an array of tantalizing toppings. |
Conclusion
Baking mini cakes without a pan is an ingenious way to let your creativity shine in the kitchen. By following this detailed step-by-step guide, you can create delightful treats that are not only delicious but also visually appealing. From unique shapes to personalized decorations, your mini cakes will surely impress friends, family, and anyone lucky enough to enjoy your homemade creations. So, the next time you find yourself without a baking pan, don’t hesitate to embark on this creative baking journey and whip up mini cakes that are sure to be a hit!
FAQ
While parchment paper is preferable due to its non-stick nature, you can use aluminum foil as an alternative. Just be cautious when removing the cakes to avoid sticking.
The thickness of the cake batter will determine the texture of your mini cakes. Thinner batter will yield crispier cakes, while thicker batter will result in softer, cake-like textures.
Yes, you can use this method with most cake recipes. However, keep in mind that some recipes might yield better results than others. Experimentation is key!
While the focus here is on mini cakes, you can certainly adapt this technique to create larger cakes. Just adjust the size of the parchment paper and the amount of batter accordingly.
In general, cake batters that are not too dense or overly liquid will work well. Sponge cakes, vanilla cakes, and light fruit cakes are good options.